Before you start, confirm you have the correct update files. The charger UI and the firmware are updated separately, so you need the right file for each.
❗️ DWIN_SET.zip is the charger UI (display software).
❗️ firmare.rbl is the charger firmware (mainboard).
Download the latest update files here.
Table of contents
Preparing the SD card
- Prepare an 8 GB SD card. Plug it into your computer and check that the disk is detected. Format the card before using it for the first time.
- Use Win+R to open cmd interface :
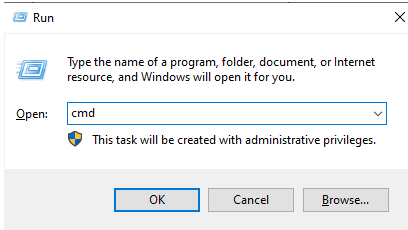
- Format the card. In Command Prompt, enter:
format/q d:/fs:fat32/a:4096
"d:" is the SD card's drive letter, so check which letter yours uses, then follow the prompts to finish formatting.Note: space after format/q
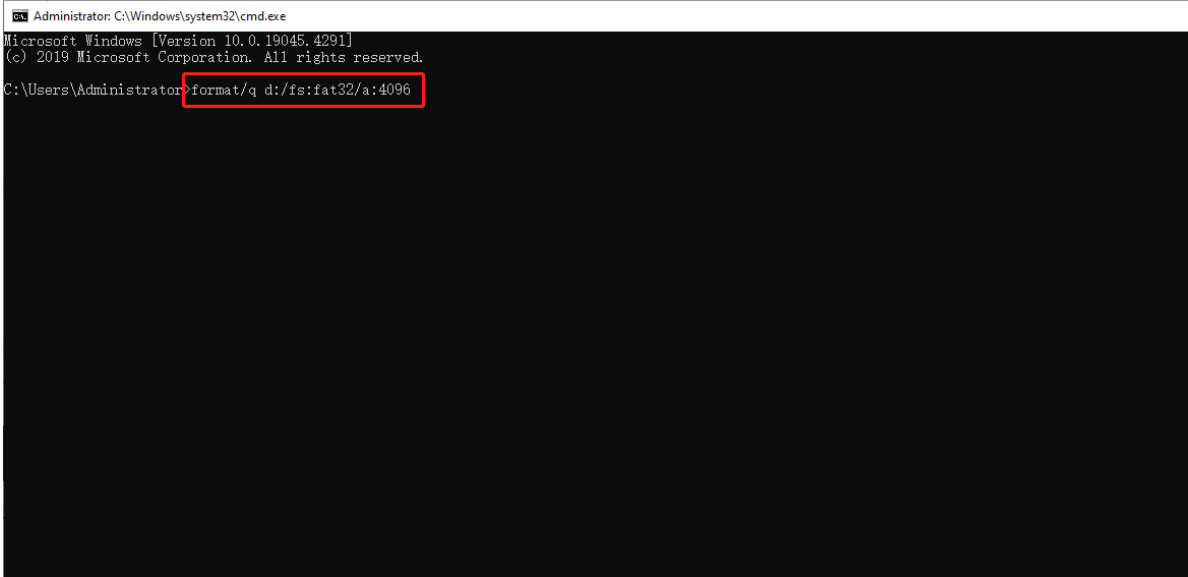
- Download the update files here and save them.
- Copy the files onto the SD card by dragging them across.
Make sure you copy the files themselves — not "Copy as path".
- Eject the SD card once the files have finished copying.
Updating the UI
- Power down the charger.
- Open the charger and locate the display's SD-card slot.
- Push the SD card into the slot until it is seated.
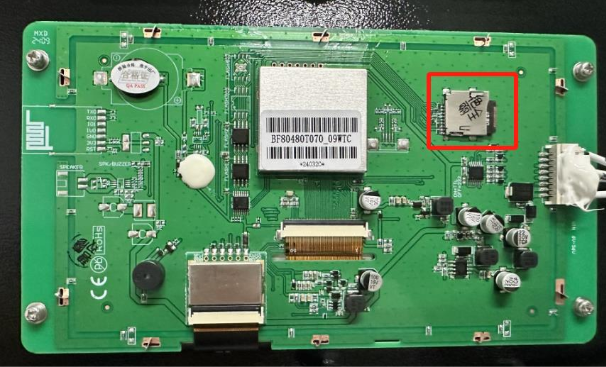
- Power the charger back on and wait for the update to finish.
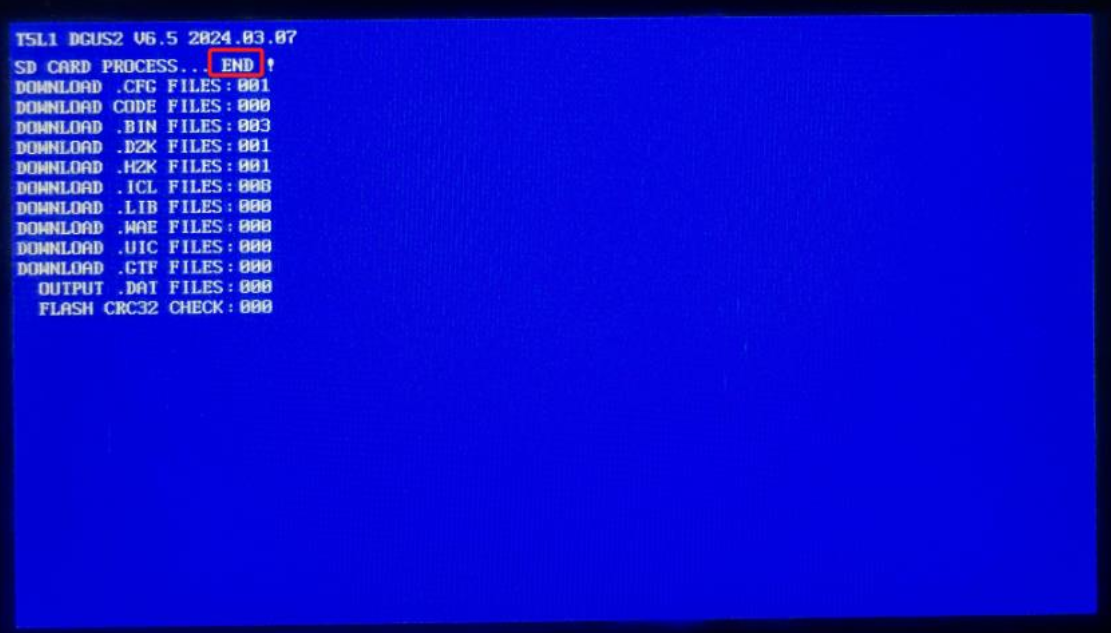
NB! Make sure the charger's screen shows SD CARD PROCESS … END!
- Power down the charger and remove the SD card.
- Power the charger back on.
- Confirm the UI has updated.
Updating the firmware
- Power down the charger.
- Open the charger and locate the mainboard's SD-card slot.
- Push the SD card into the slot until it is seated.
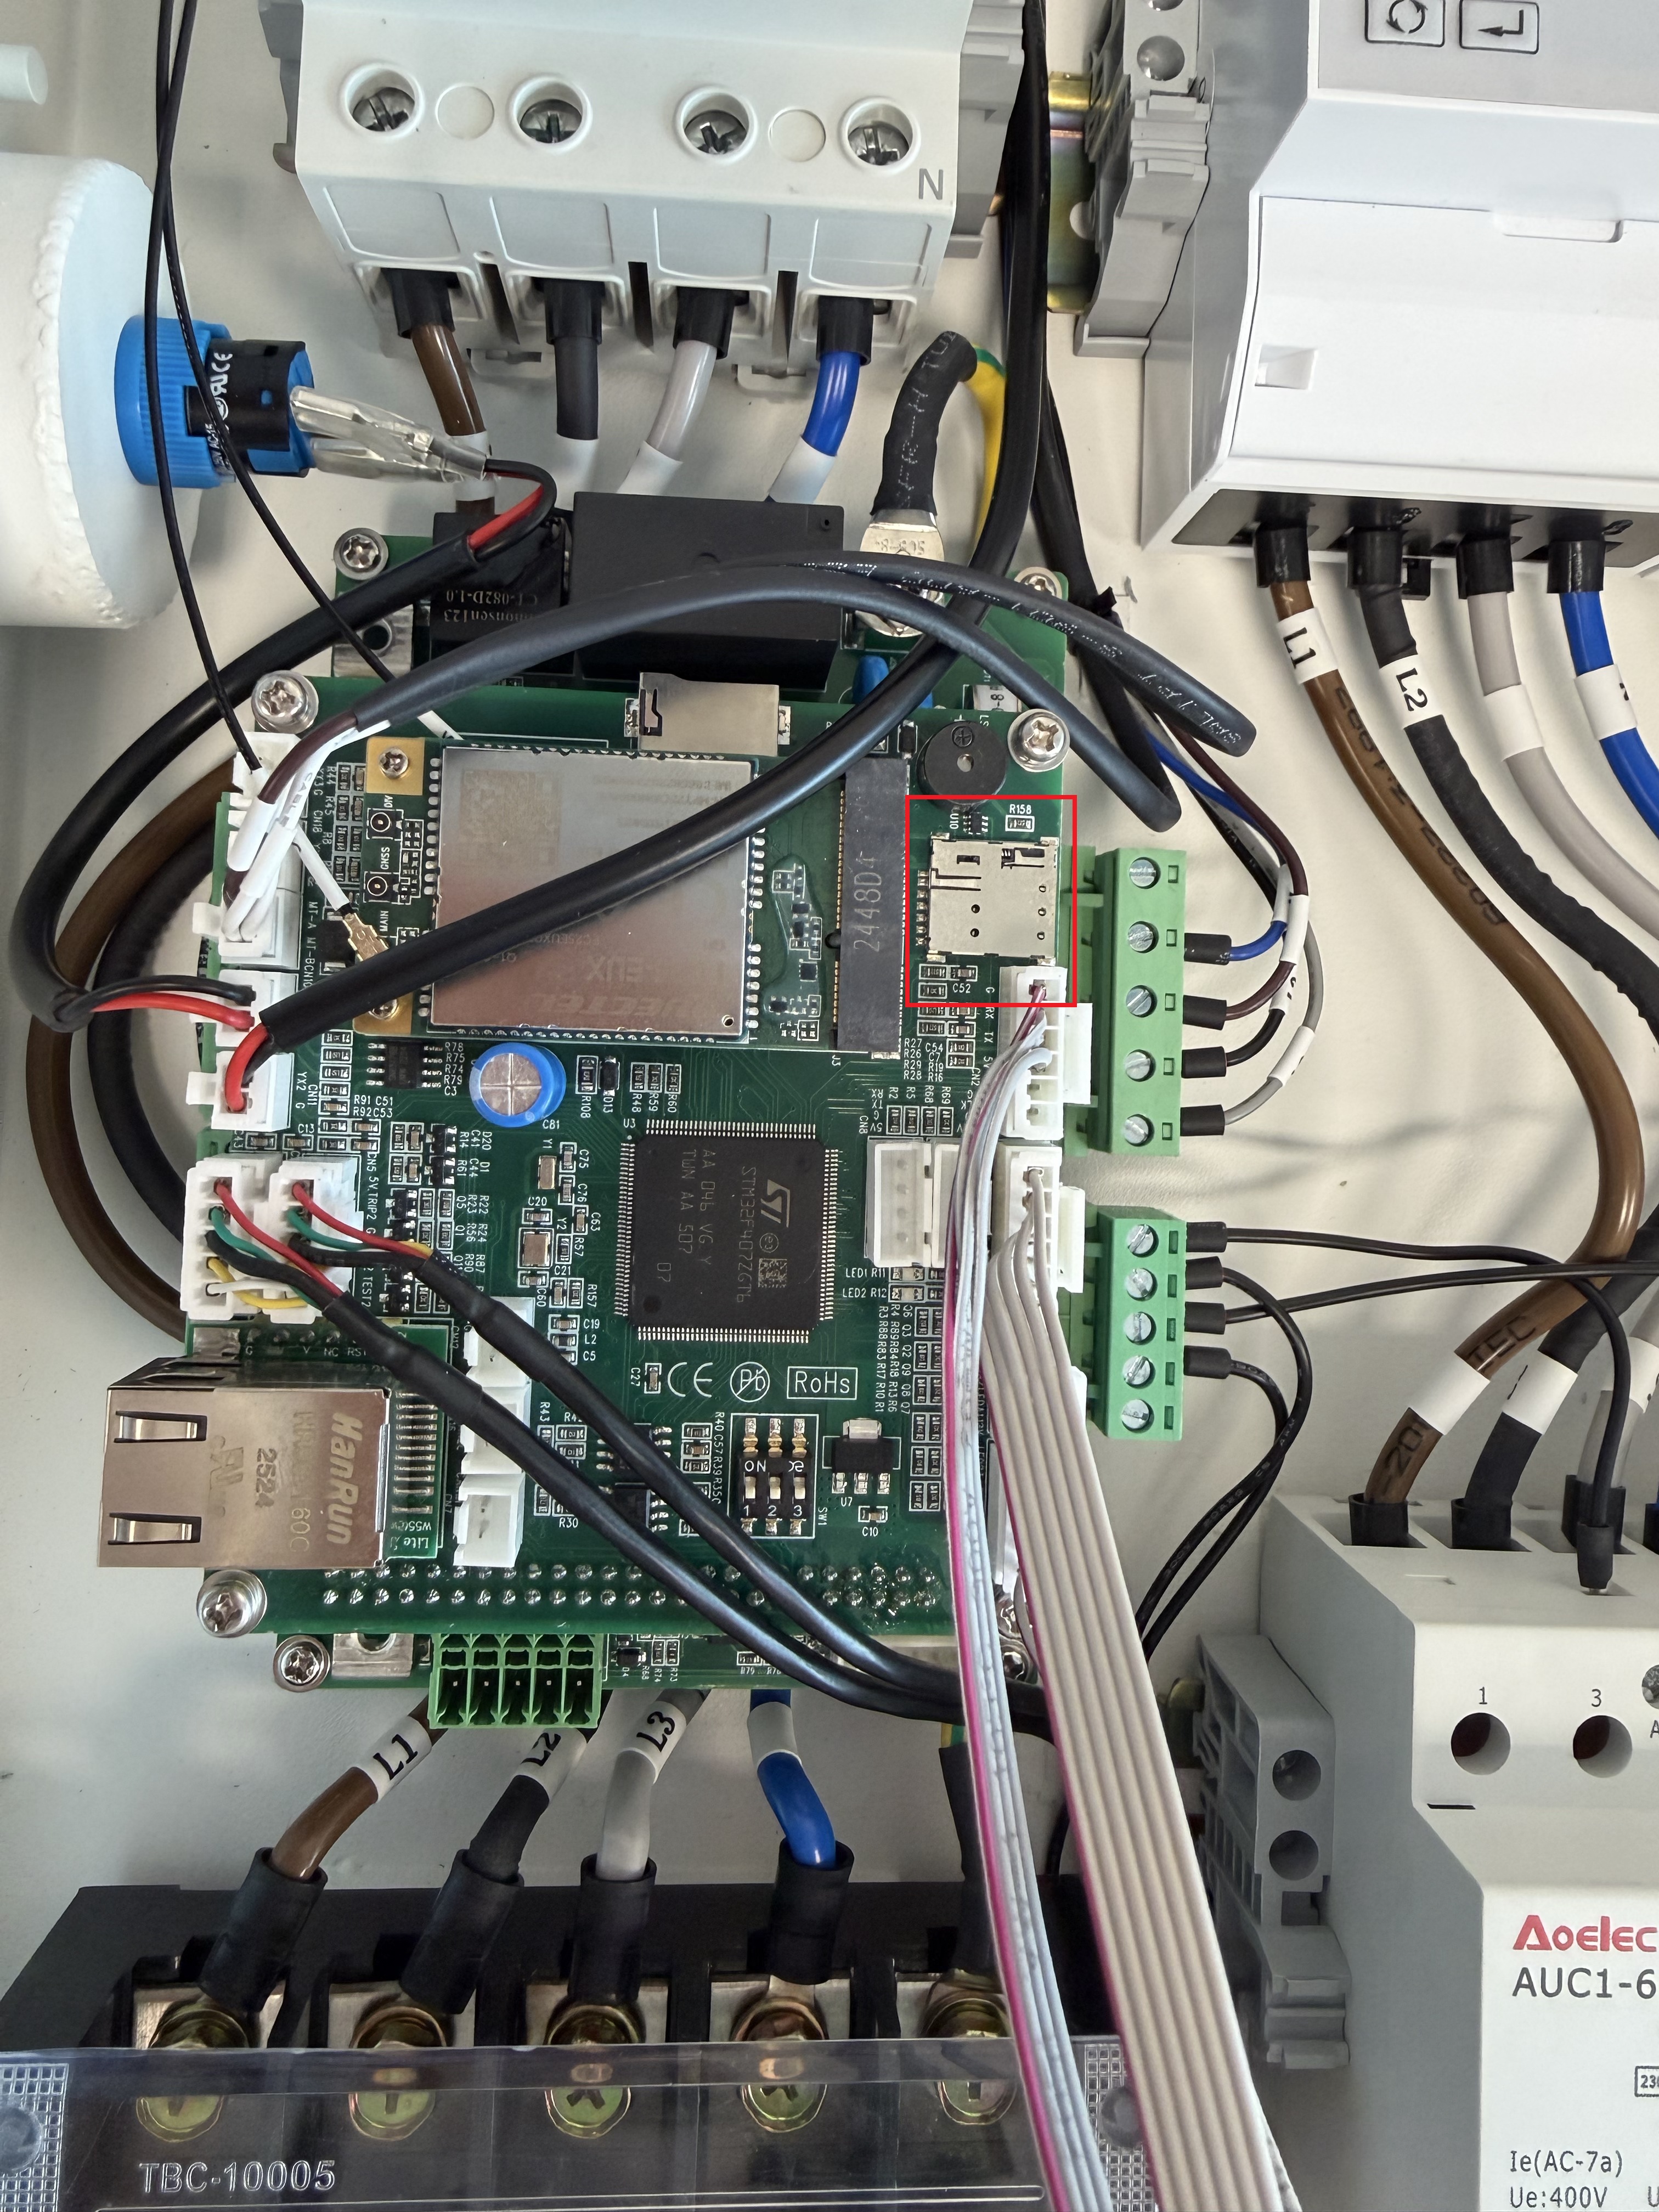
- Power the charger back on and wait for the update to finish.
NB! Do not unplug the SD card during the update. The LED will blink and the charger will beep while uploading.
- Power down the charger and remove the SD card.
- Power the charger back on.
- Confirm the firmware has updated.
Checking the installed versions
- Press the Morek logo in the upper-right corner until the management screen appears.
- Enter the password if asked. The default is 1234.
- Press Charger information.
Latest versions
Firmware: AC_D_V2.3.32_20260627
UI software: LCD_L01
Was this article helpful?
That’s Great!
Thank you for your feedback
Sorry! We couldn't be helpful
Thank you for your feedback
Feedback sent
We appreciate your effort and will try to fix the article