TABLE OF CONTENTS
Preparations
Connect the charger to your router’s LAN port using an Ethernet cable.
Connect your laptop to the same router via Wi-Fi.
On the charger screen, find the Charger IP (see section for network configuration).
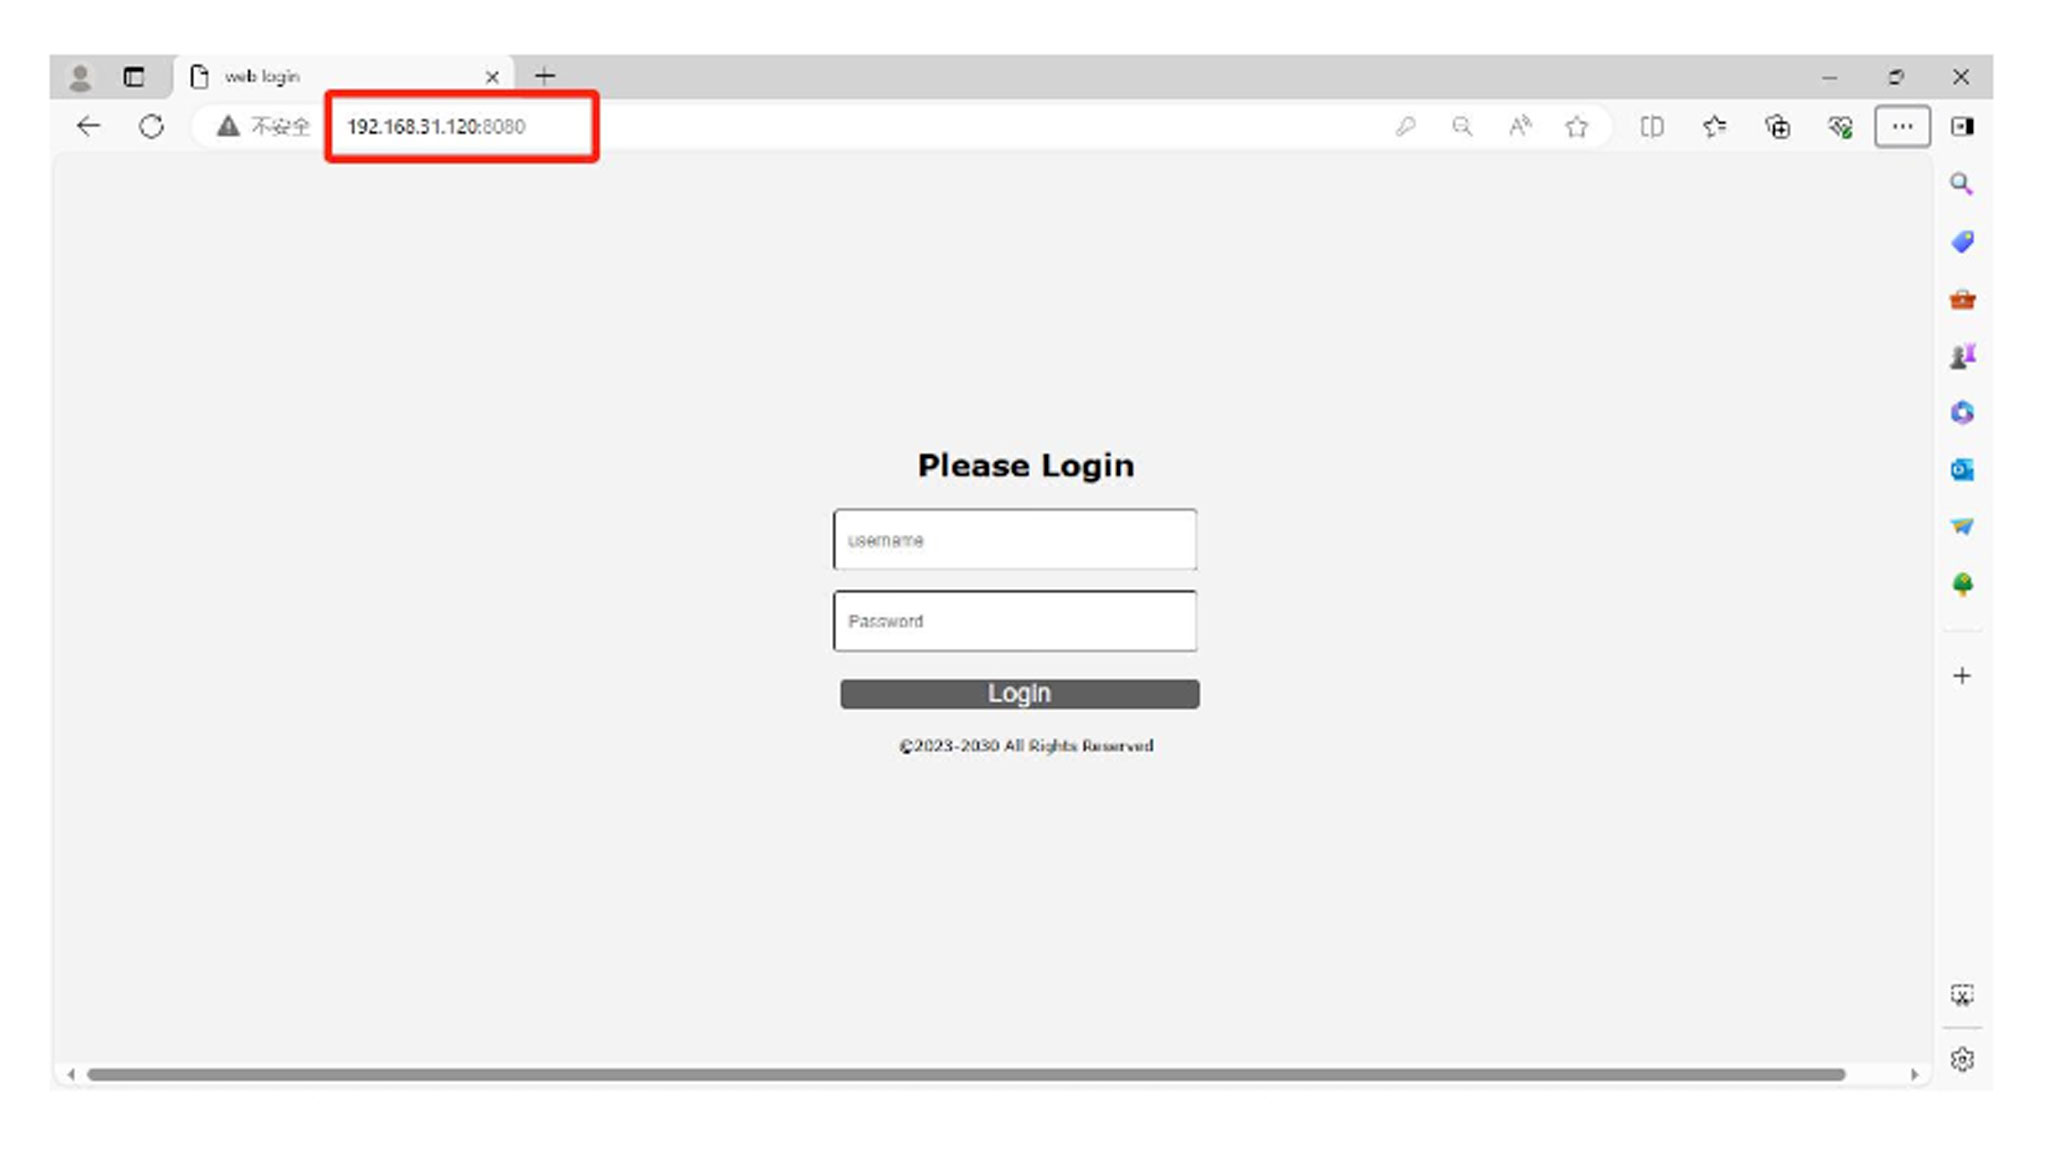
Enter the Charger IP into your browser, followed by :8080.
For example, if the Charger IP is 192.168.31.120, enter 192.168.31.120:8080 into your browser.
OR
Connect your charger's RJ45 port directly to your laptop using an Ethernet cable.
Check the Charger IP address from the charger screen.
Modify your computer’s Ethernet settings so it is in the same IP range (network segment) as the charger.
Web configuration access
Username: admin
Password: 12345678
Press “Login” or hit Enter to access the tool.
Network & System Configuration
Physical connections inside the charger:
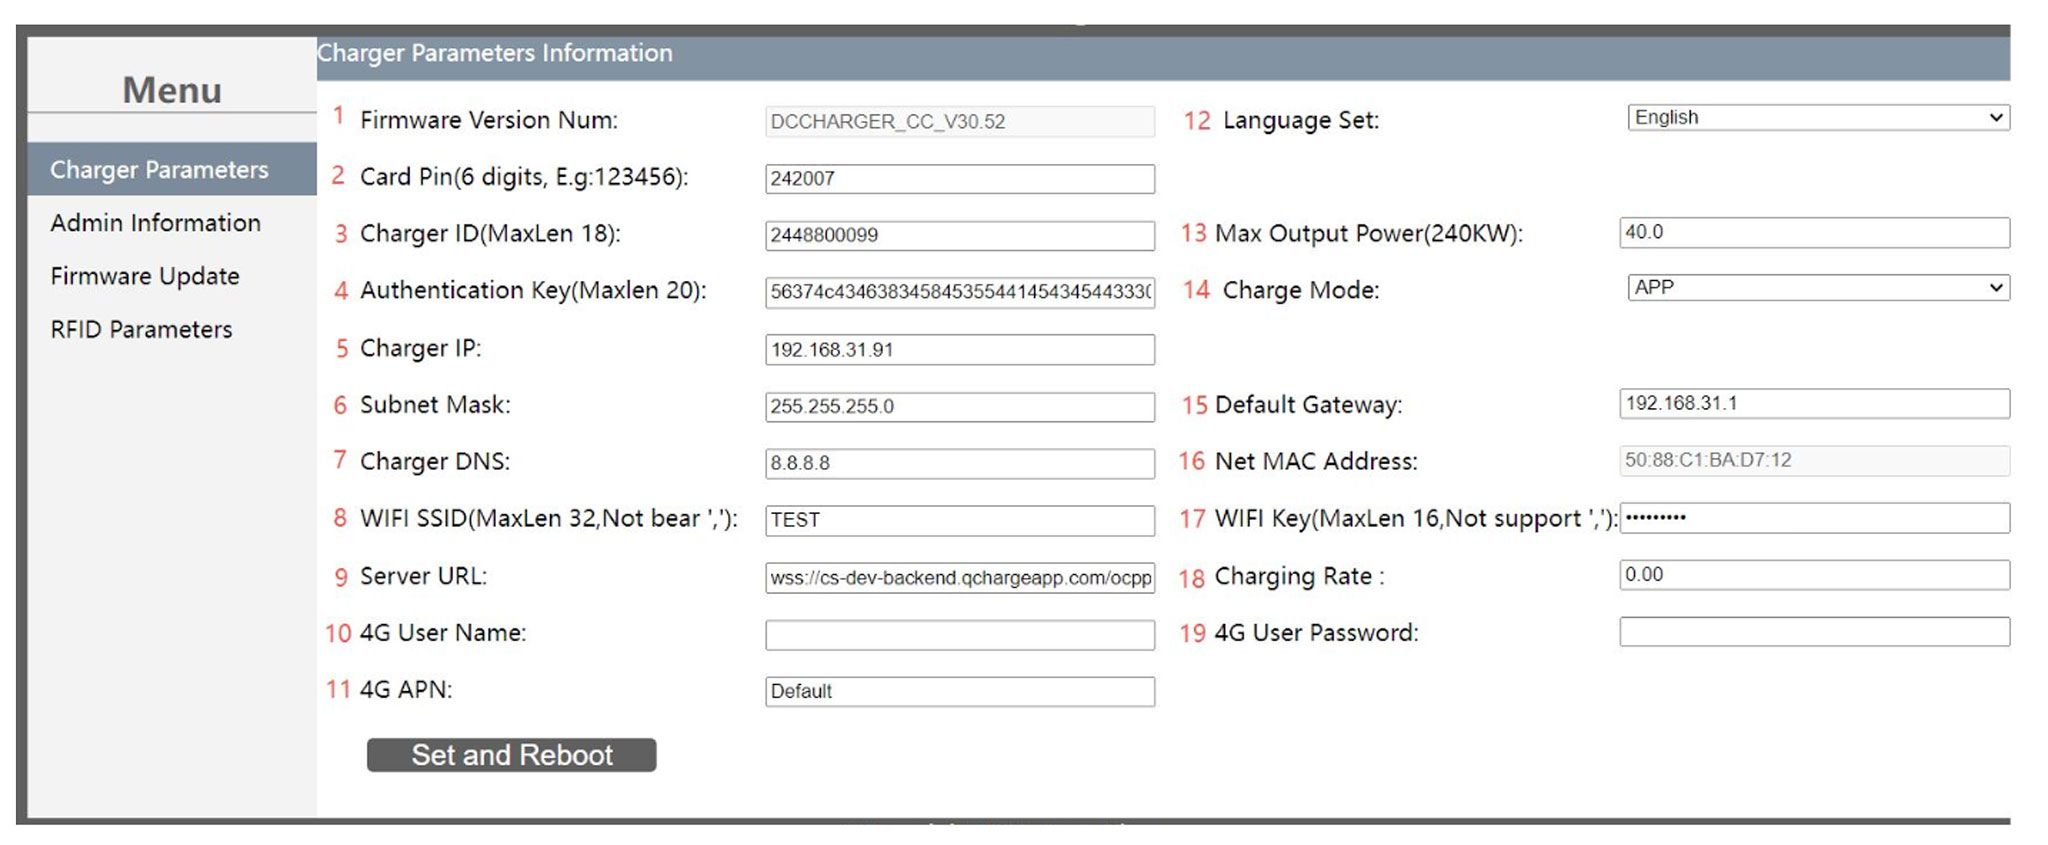
Charger parameters
- Firmware Version Number – Displays the current firmware version installed on the charger.
- Card PIN (6 digits) – PIN code used for RFID card operations.
- Charger ID (Max Length: 18) – Unique identification number of the charger.
- Authentication Key (Max Length: 20) – OCPP authentication token used for backend connection.
- Charger IP – IP address assigned dynamically by the router (DHCP).
- Subnet Mask – Subnet mask of the charger’s network.
- Charger DNS – DNS server address used by the charger.
- Wi-Fi SSID (Max Length: 32) – Network name for Wi-Fi connection.
Note: Special characters like apostrophes (‘) or commas (,) are not supported.
- Server URL – OCPP backend URL the charger connects to.
- 4G Username – Username for mobile network authentication.
- 4G APN – Access Point Name for the mobile data network.
- Language Setting – Only English is currently supported.
- Max Output Power (e.g., 240 kW) – Limit for maximum charging output power.
- Charge Mode
- APP – For commercial use with OCPP backend control.
- Plug & Charge – Simple plug-in charging without backend.
- Default Gateway – Default route for network communication.
- MAC Address – Hardware address of the charger’s network interface.
- Wi-Fi Key (Max Length: 16) – Password for Wi-Fi connection.
Note: Does not support apostrophes (‘) or commas (,).
- Charging Rate – Configurable rate for charging sessions.
- 4G User Password – Password for 4G mobile network login.
To activate DHCP for automatic IP assignment, enter the charger’s admin menu by double-tapping the upper left corner of the screen, then open Network Parameters → “Net parameters”. Password is 1234.

Find DHCP and set it to 1 to activate it, or 0 to disable it.

In this page you can also see the static IP address of the charger.
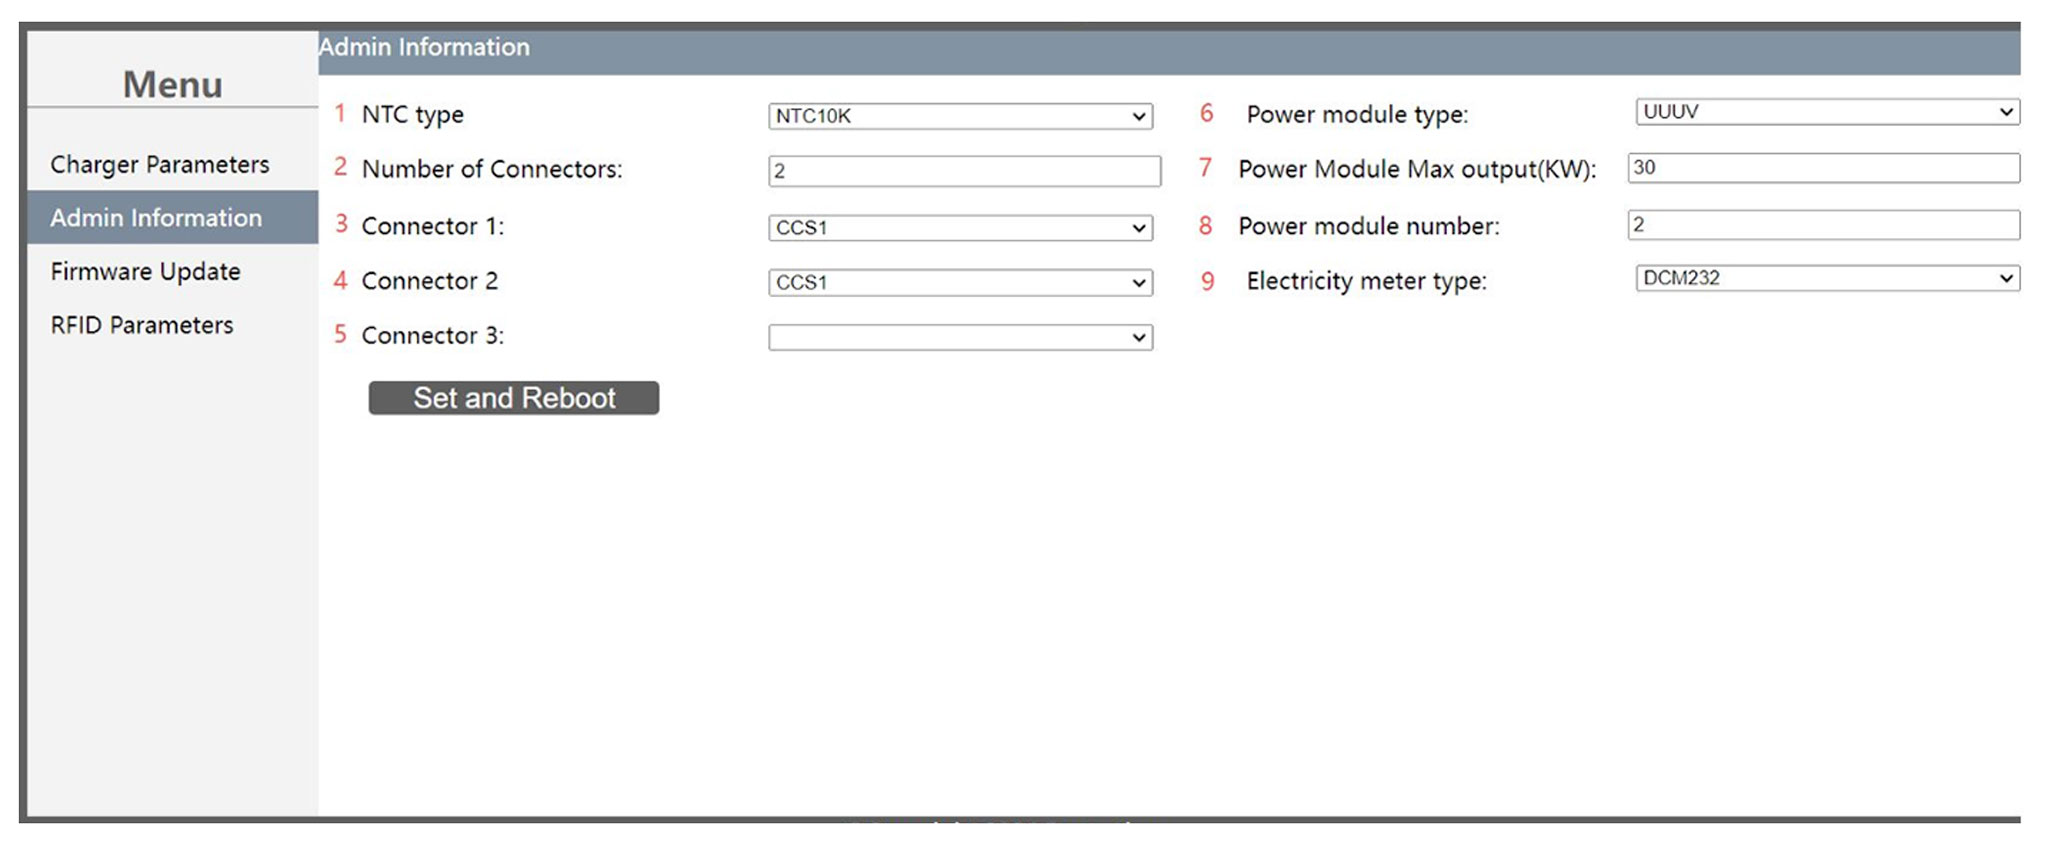
Admin information
NTC Type – Choose the appropriate NTC (Negative Temperature Coefficient) sensor type.
Number of Connectors – Select between:
Single-port version
Dual-port version
(Ensure correct selection to match product specification)
Connector 1 Type – Choose one:
CCS2
CCS1
NACS
CHAdeMO
Connector 2 Type – Choose second only if dual-port model is in use:
CCS2
CCS1
NACS
CHAdeMO
Connector 3 Type – Optional if a third port is available:
CCS2
CCS1
NACS
CHAdeMO
Power Module Brand – Select the correct brand/model of the power module used.
Power Module Max Output – Define the maximum output capacity per module (e.g., 30 kW, 40 kW).
Number of Power Modules – Enter the number of power modules installed.
Electricity Meter Type – Select the type/model of the built-in energy meter.
Firmware update – Add the firmware package and upload it to the charger. Make sure the upgrade process is fully completed before taking any further actions beyond the update itself.
RFID parameters
Add RFID cards to the charger’s whitelist to authorize offline charging. Type the card number (idtag) and push "ADD".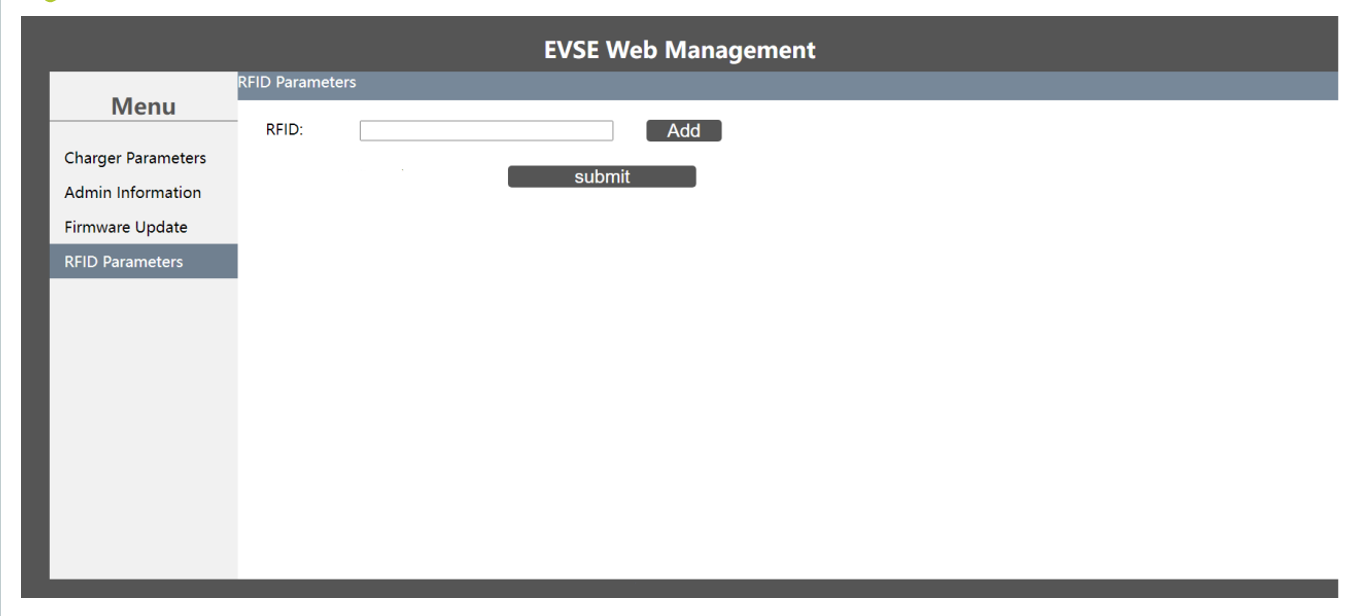
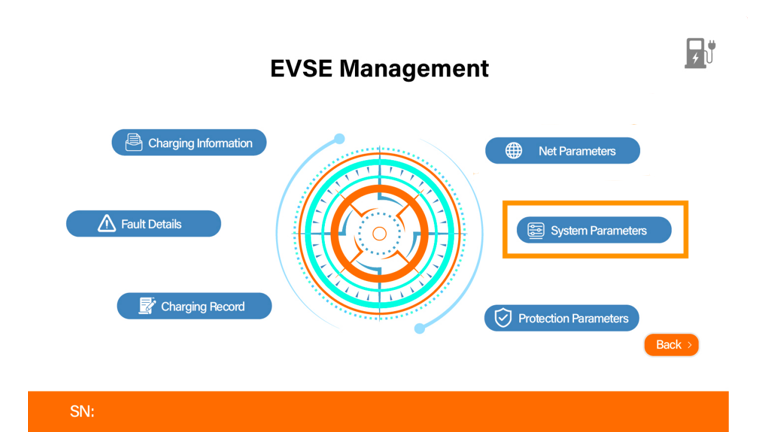
RFID cards can also be added directly from the charger’s screen without using the web UI. To add a card from the charge point screen, enter the admin menu by double-tapping the upper left corner of the screen. Then go to “System Parameters” (password 1234).
Find “Card Bind”, press it, and swipe the new card on the RFID reader to bind it to the charger.

Note: if the charger will be connected to a backend, all RFID cards must be added in the backend, not directly in the charger.
Power adjustment
chargerThe maximum power of the charging can be adjusted:
- Via Web interface by modifying "Max Output Power" setting
OR
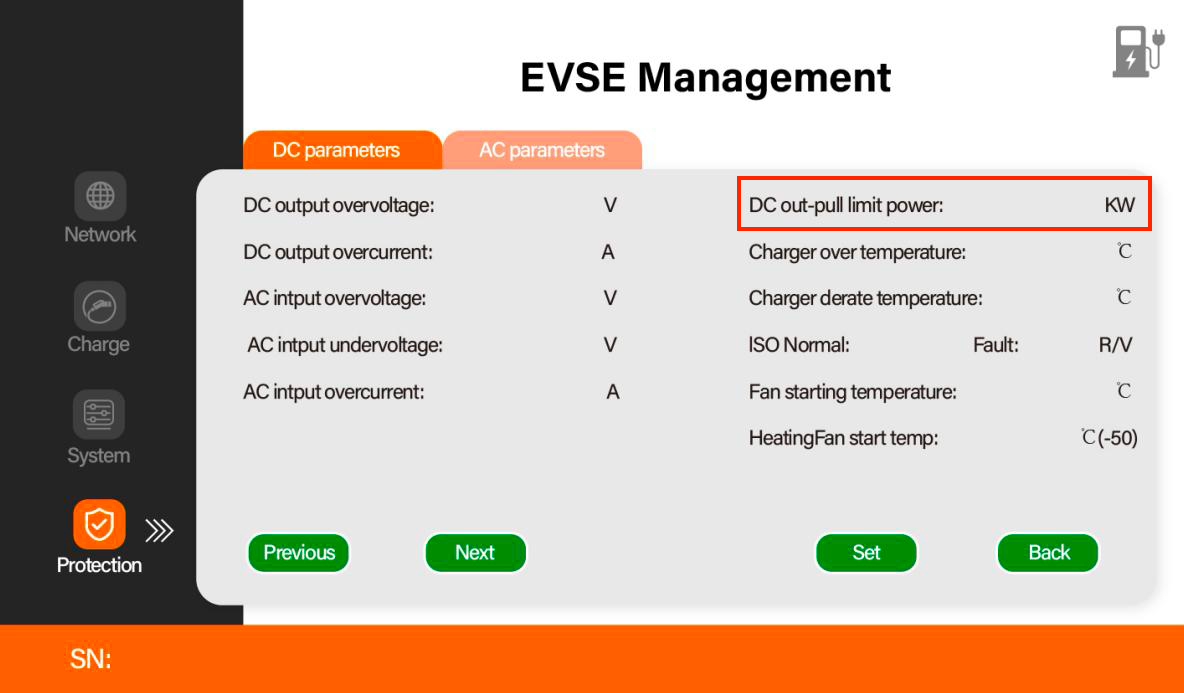
- Via display under "Protection" section:
Was this article helpful?
That’s Great!
Thank you for your feedback
Sorry! We couldn't be helpful
Thank you for your feedback
Feedback sent
We appreciate your effort and will try to fix the article